
Note – if you don’t have a Jobber CRM trial set up, get one here!
This blog post will get you through the basics of your Company Portal setup by showing you the Jobber client portal setup. We’ll look at more features in upcoming segments.
The Jobber CRM welcome screen
When you start your Jobber CRM demo account, you’ll see a list of things to do, along with some (highly optimistic) time estimates. We’re focusing on item two – “Explore your personalized online client portal.”
Wait – what’s an online client portal?
If you’re new to automating your business and some of your routine customer interactions with Jobber CRM (or customer relationship managers in general), the online client portal is the place where your customers can go (once they’ve requested work from you):
- to contact you again
- see quotes
- make appointments
- view/pay invoices.
Go here and fill out a (demo) service request if you’d like to see it in action! (Link goes to the Nectar Bridge demo account work request form). Once we enable your work request, you’ll get an email with a green button that says “View Request,” and you can see the client side of this portal.
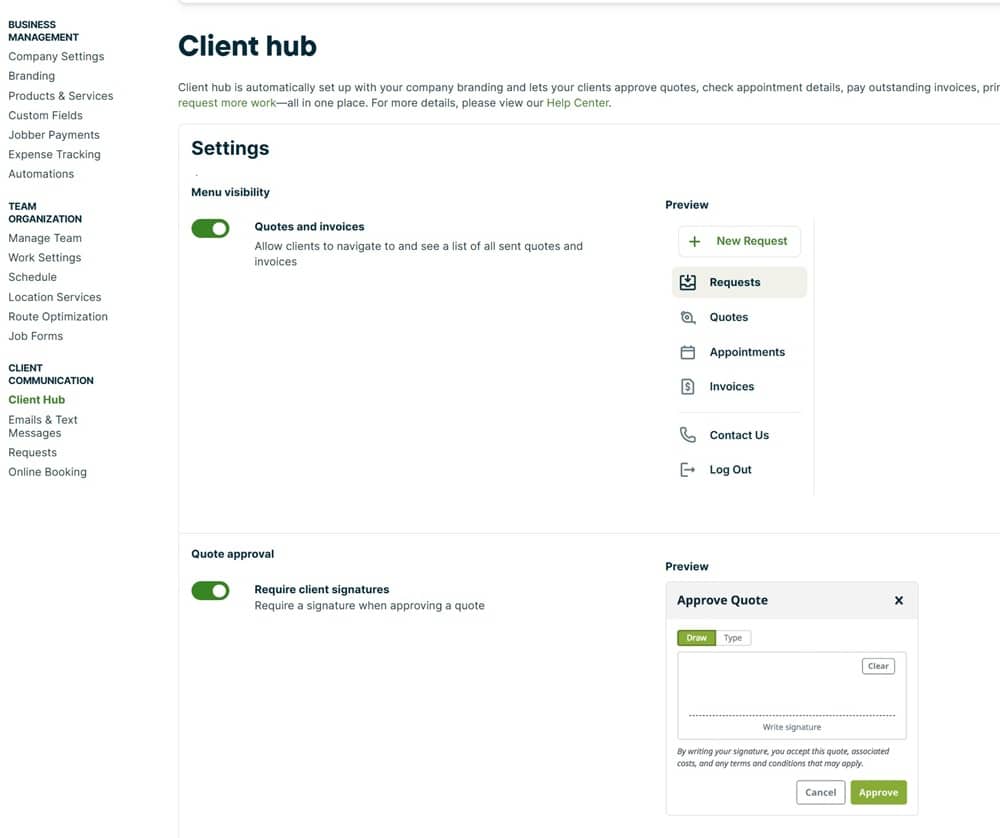
Explore your personalized online client portal
When you select the option “Explore your personalized online client portal,” you’ll find that most of these settings are essentially on/off sliders. Turning an option off disables it in the client portal so that the customer can’t see it. In general, it makes sense to leave these options on, but there may be situations where you want to disable certain settings.
For example, if you’re in an industry where change management on a job gets complex and you want to require your customer to talk to you and get a new quote rather than start making changes on a sent quote, you might want to disable “Clients can request changes.”
Or if you prefer to make a general statement about when you will arrive rather than show a client a firm scheduled time, you can turn “Show scheduled time” off in the portal view. You will always be able to adjust these settings, so don’t sweat these decisions too much.
Get the URL for your jobber client portal and the work request form
At the bottom of the page there is a white button with green text that says “Copy URL” – this button allows you to get your personalized URL to add to your website, contact emails, or any other place where it’s appropriate to provide it. Note that this URL will only provide access to your portal for existing customers. For new customers, you would need to provide the “New Request” form.
We’ll talk more about this in a later post, but for now you can either go to the top left column of the Jobber screen and create a request for a customer, or find this link by going to the jobber client portal, entering an email which is NOT in the system (hint: that will be just about any email, including your own, if you’re just getting started). Now click the link at the bottom of the screen which says “Looking to request work? Go to our online form.” Copy that URL and you’ll have a link to your work request form.
Again, we’ll talk more about this later; this is a workaround so that you can get to your work request form quickly for now.
Here’s a video from Jobber which shows an overview of the Jobber client portal experience for your customers:
To do all this right takes more than five minutes! Contact us if you have any questions or if we can help you choose and implement home services management software like Jobber CRM.